Add custom icons to MeshCentral (part 3 – styles)
Carrying on from part 2 (night mode), if you copy the stylesheet style.css from C:\Program Files\Open Source\MeshCentral\node_modules\meshcentral\public\styles (in my installation) to our custom directory (- in this case C:\Program Files\Open Source\MeshCentral\meshcentral-web\public\styles) and make a few adjustments, it’s a little prettier. These are the sections to change:
.DevSt {
padding: 15px !important;
background: #333;
border-radius: 10px 10px 0px 0px;
margin-top: 10px;
width: calc(100% - 30px) !important;
}
.night .g1t {
background-image: linear-gradient(to right, #000 0%, #333 100%);
visibility:hidden;
}
.night .g2t {
background-image: linear-gradient(to right, #333 0%, #000 100%);
visibility:hidden;
}
.night .e2t {
color: #CCC;
background-color: #000;
}
.night .e2s {
background-color: none;
}
and at the end of the file, add the following (if you have more that two groups of computers adjust accordingly):
#DevxCol1 {
background: #333;
padding: 20px;
border-radius: 0px 0px 10px 10px;
}
#DevxCol1 > div {
background: #000;
border-radius: 10px;
padding-bottom: 9px !important;
margin: 5px;
border:1px solid transparent;
}
#DevxCol2 {
background: #333;
padding: 20px;
border-radius: 0px 0px 10px 10px;
}
#DevxCol2 > div {
background: #000;
border-radius: 10px;
padding-bottom: 9px !important;
margin: 5px;
border:1px solid transparent;
}
#DevxCol1 > div:hover {
border:1px solid #9CF;
}
#DevxCol2 > div:hover {
border:1px solid #9CF;
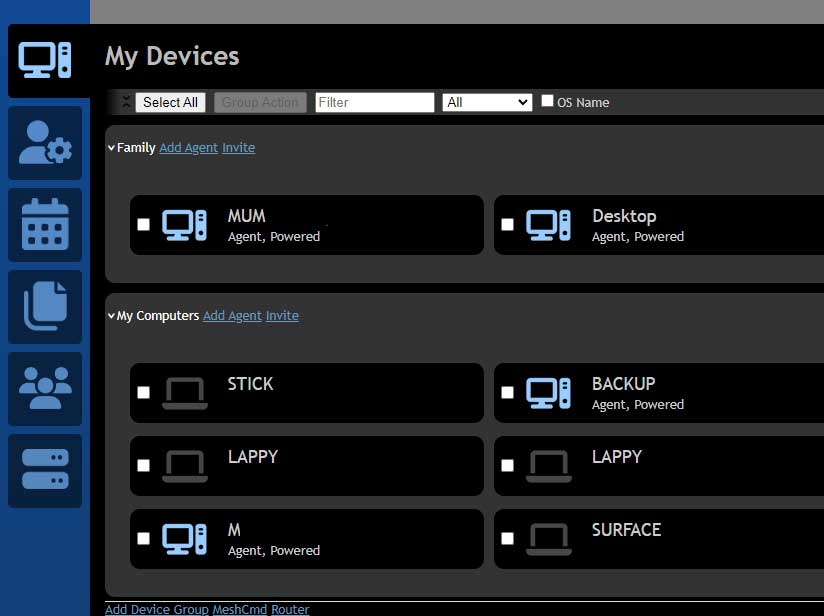
}And after restarting the server it should look something like the below: